Pages

Tuesday, 27 August 2013

Lemon yoghurt cake

Being a vegetarian for me is not difficult.  Especially when my family is mostly vegetarian and my dad makes the most delicious vegetarian dishes ever. There are many more plant based food out there, so many more delicious choices that you can choose from to feel deprived of the few meat selection that we don't eat. A trip to the morning market will leave you filled with such joy from seeing the colourful produce. 


Eating out is of course a different matter. Majority of the restaurants have menus that are dominated by the meat selection.  Although there has been an increase in awareness of special diets consumers and most restaurants do have a few dishes to accommodate vegetarians but it is still that isn't it? To accommodate rather than to celebrate. But anyway, I am not that picky. Even though I would love to see the veg scene in Auckland expand, I am glad that at least most restaurants do offer vegetarian options. And if they don't, most places are more than happy to omit the protein part of the dish if you ask nicely. I mean, it saves them money. 


Over the past week I have been tied down by tests and assignments. One assignment in particular was especially difficult for me to do. It is about meat. Just my luck. We had to discuss the reactions of myoglobin, which is the main protein in meat responsible for meat colour, which also translates as meat quality in most consumers' eyes. After 4 weeks of procrastination, and a final week of forcing myself to research and write, I managed to squeeze out about 4000 words. (So glad that the lecturer said to NOT write 6000 words but rather to ere on the halfway mark as he's got a pile of thesis to go through alongside our assignments.) By about an hour before the deadline, I've truly had enough. I have tried my best in writing about something I am passionately against. I felt saddened by some facts that I read. Like wow, global meat consumption increased by a whopping 600% since 1950. How many kgs of meat are people eating per year? How many animals are being killed each day just so humans could enjoy the taste of it for a curt few seconds/minutes? Why must human build our enjoyment on others' suffering? 

Anyway, after I handed in the assignment, I headed straight home. As I passed my front lawn, I noticed the daisies have sprung up, white and yellow in the sea of green. That sight cleared my mind. I just love how strongly survival driven plants are. Just a few days of heavy rain and the soil have moistened enough for these plants to shoot out. Odd as it is for daisies to bloom in August, signaling the premature arrival of spring, I felt comforted by the thought that the season of growth is upon us. 


I am also glad that the winter fruits are still in full bloom! Our lemon tree in our backyard's been having a field day (month). So much yellow!!! So much happiness!! So much earthy satisfaction and pure joy just looking at them!! I love lemons. They're like laughter growing on a tree. That vibrant colour just blows away any dark clouds in your mind. So. In celebration of winter's gifts and early spring, I made a comforting lemony lemon cake :) 

[Lemon Yoghurt Cake]
280g flour (I used 200g unbleached AP flour + 40g wholemeal flour + 40g almond meal. The almond meal makes it much moister)
3 tsp baking powder
1/2 tsp salt
2 eggs
140g raw sugar, blended
1 tsp raw honey
1 tsp vanilla
zest of 2 lemons
juice of 2 lemons 
250ml natural yoghurt
120ml olive oil

1. Preheat oven to 180C. Line an 8 inch cake tin. 
2. Sift together flour, baking powder and salt. Set aside. 
3. Beat together eggs, sugar and honey until thick and pale. 
4. Add the vanilla, zest and juice of lemon. Beat until well incorporated. 
5. Stir in the flour mixture until just combined. 
6. Stir together olive oil and yoghurt until well mixed. Add to the cake mixture. Stir until just combined.
7. Pour into the lined cake tin and bake for approximately 45 minutes or until skewer inserted comes out clean, cake is well coloured and firm but slightly bouncy to the touch. 
8. Remove from oven and cool in tin for 10 minutes before removing the cake from the tin and cooling on a wire rack. 
9. Serve as is or with a dollop of yoghurt. 


Wednesday, 21 August 2013

Pretty Pot of Pink


Yoghurt. The trendy food. Over the past few years, Auckland has finally been bitten by the yoghurt bug. There are so many yoghurt stores in the CBD now that you'd have a hard time picking which one to go (that is, if you haven't tried them all and don't know which one is the best - yep that's me.) I remember only a few years back, there was only one yoghurt store in town. But to be frank, one was enough. Yogoberry! They served the best frozen yoghurt - creamy, refreshing, smooth, slight tang, not overly sugarified, yum! And even better, you can get their yoghurt in a cone, in a cup, with loads of fruits and sauce toppings, whizz it up in a smoothie, OR - the one that most people opt for, paired with freshly made waffles with loads of fruits and sauces. Delish much? Heck yeah. And what makes this store even more amazing is that it is manned (or shall i say wo-manned) by the Korean lady owner, who is friken amazing - taking orders, making all these food for a store full of people all by herself. 

Ok, I didn't mean to spend a whole paragraph advertising for Yogoberry. Couldn't help it though! It was that amazing and still is. I do however want to try some other yoghurt stores in town, espesh this one called White and Co. So many people have posted photos of their fro-yo which made me crave them for weeks, though i haven't even had them. But the thing is, their store is located quite some distance from uni and because it's not on-the-way-from-uni-to-my-bus-stop so if i want to get there, I have to take a big detour. And with test and assignment season fully in swing, me don't exactly have the time for that. 

So. Solution. Make my own. And here it is! 
I don't exactly have a recipe for it, since I pretty much just chucked everything in the blender. Bit of natural yoghurt, few frozen strawberries (ones that we hand-picked ourselves many moons back! Oh how i miss summer...), some honey AND a special ingredient, flaxseed or linseed oil. You can pretty much make it to your liking. Add any fruit that you have at hand, any form or sweetener in your pantry - agave, golden syrup, red sugar, whatever floats your boat. and the best part about that is, you can really taste the fruit - not some artificial flavouring from some store bought ones!

Anyway, before I run off (well, not literally) to continue writing my assignment, let me briefly tell you about flaxseed oil. And yoghurt. And cottage cheese. 

Well, we all believe that cancer cannot be cured right? Wrong. Dr Budwig, who hailed from Germany spent many many years studying this simple combination of cottage cheese (or yoghurt, because it has the same active compound) and flaxseed oil. And she found that if you blend the two together (in a particular proportion), they make the perfect solution to counter and fight those Nazi-fied cancer cells, tame them and make them into good cells again! Now, we all know that cancer cells are merely good cells gone bad, caused by lack of love, lack of care, lots of abuse and fouling. In a nutshell, it is karma. You've abused your temple and now it's all dirty and full of junk and holes and broken pipes and lots of pests and horrifying stuff. So how do you cure yourself of cancer? Obviously, the thing to do is to clean up your temple. Like truly, make it spotless and holy and serene. Dr Budwig's cottage cheese and flaxseed diet is like a super powerful detergent. So it speeds up the cleaning process. Now of course, I'm not making any claims about this miracle diet. Because I believe however great something is, it still depends on the individual, like their history, karma, how vigorously they've actually turned a new page in their life, how much effort they are putting in to heal themselves, etc. Also, it's not just about change in diet. There are many many other factors like the spiritual aspect of it, emotional side, like letting go of anger and greed and all the attachments, etc. Once you're free of all these pollution which are mostly created by yourself, your temple will then be tranquil. 

Haha, from yoghurt to temple. How'd that happen? 

Anyway, happy whizzing. 

PS. If you have time, you could whiz this up and chuck it in the freezer or ice cream machine and wait a few hours before consuming it and then you'll really have some homemade froyo! Coz obviously this is just yo. Minus its fro.

PPS. If you wanna know more about the cottage cheese + flaxseed oil diet, Google Dr Johanna Budwig. 


Follow my blog with Bloglovin

Friday, 16 August 2013

Almond, coconut and chocolate cookies (Gluten Free)


It's Friday afternoon and there's an abundance of soaked shoes, icy nose, numb fingers and upturned umbrellas. On the other side of the window, my life is also saturated with the same sort. You know that situation that you're in where you just have too many things on your list that you couldn't bring yourself to doing any of it? Yeah, that happened. And of course, there are the many things that popped up that HAD to be done instead of sitting down, with a cup of tea, some snacks, in front of my laptop, with 8 hours ahead of me to write my essay. I'm the biggest pro at procrastinating I tell ya. Even in the wake of exam, I could STILL be browsing blogs. 

Anyway, seeing that my test IS next Monday (ie. two and a half days away - gasp) and I DO have TWO assignments due (which includes one which I have TRIED - honestly, I have - many many times to write but after literally 3 weeks, my word count still remains at 23, which constitutes of my title and subheadings - whoop! At least I've done that?)in a week, I think I REALLY HAVE TO sit down with a cup of tea, some snacks, in front of my computer and just start writing the damn 6000 words on myoglobin. I swear though, there was something blocking me from writing that assignment. EVERY SINGLE TIME I tried to start wri- ok, I'll stop. 

Ok, I promise I'll start writing it, after I finish this blog post. This cookie is sort of a marriage between THIS HOTTY by Top with Cinnamon and THIS BEAUTY from Sprouted Kitchen. Like, these people - Izy, Sara and Hugh are so talented (and hardworking). I just get so inspired everyday. And of course all the other amazing blogs out there like My Darling Lemon Thyme, Local Milk, Happyolks, Not without Salt just to name a few, are what kept my passion for food burning. Argh everything just looks so delicious and the photos! They make them look so effortless. A-mazing. Really. I have to say thank you to these guys for doing what they do, for continuously making such delicious food and for sharing them. In all honesty, this is probably what kept me from writing that 6000 word essay haha. Maybe.


Well before I rant on for too long, here's the recipe.


Almond, coconut and chocolate cookies (Gluten Free)

3 tbsp olive oil
Any herb (I used what I found in my garden, which was sage and... some really fragrant herb with cute leaves that i unfortunately don't know the name of >.<)
1 1/4 cups almond meal 
1/2 cup desiccated coconut
1/2 tsp baking powder
1/4 tsp salt
1/4 cup raw sugar (blended)
1/4 chopped dark chocolate 
1 egg
1 tsp vanilla 

1. In a clean (make sure it is clean! as oil easily absorbs flavour) saucepan, add in the oil and herbs. Cook on low-medium heat for several minutes, until fragrant. Remove herbs and cool oil before using. 
2. Combine all the other dry ingredients in a bowl. Mix well. 
3. Beat egg and vanilla together until thick (homogenized and doubled in volume). Drizzle in the cooled oil while beating continuously until well incorporated. 
4. Mix into the dry ingredients and stir together until just combined. The recipe said refrigerate for at least half an hour, although I skipped this step. 
5. Shape into balls, approximately 1 tablespoonful of dough each. Place on tray then flatten slightly.
6. Bake in preheated to 180C oven for about 8-10 minutes, until slightly golden brown. 
7. Cool before serving! 


Friday, 9 August 2013

Russian Honey Layered Cake - Medovik


It was one of my friend's birthday about 2 months ago but due to an unexpected unfortunate event, he's had to cancel his birthday party and fly back to Taiwan. Two months down the track and we thought we'd throw him a surprise birthday dinner celebration. 

It wasn't hard coming up with what cake to make. There are three things that he absolutely loves (well, eating) and goes mental when any of it comes into his line of vision - bread, meat and honey. So what to make this bread meat honey monster? The answer is obviously a honey flavoured cake made of bread, with meat sandwiched in between, or featuring in any part of the cake. Being the vegetarian and animal lover that I am, of course I discounted the meat fraction of the cake. And not having copious amount of time to spend making this cake, I regretfully took away the bread portion too. 


The second thing that came onto my screen when I googled honey cake was this recipe. The layers look beautiful and the ingredients are those found in my pantry, so I went with it. 


This cake is much more simple to make than I expected. The results are impressive too. Especially when you cut out the first slice of the cake and nobody expected to see that multitude of UNIFORM layering. Expect some oohs and ahs if you serve this at a dinner party. To make sure the cake pleased the honey bear, I added an extra tablespoon of honey in both the cake and icing. 

This cake is basically a blank canvas and you can paint it with whatever flavour you like. You could replace the honey with other ingredients like maple syrup or golden syrup, or add cocoa powder or chocolate into it, or give it some tang with some citrus zest, or boost the good oil content and crunchiness of the cake by adding some nuts. You could even spike it with whatever booze you have lying around and give it that extra dimension of flavour. 


[Russian honey layered cake - Medovik]

Cake
2 eggs
1/2 cup sugar
50g butter
3 tbsp honey
1 tsp baking soda
1 tbsp vinegar
3 cups flour (I ran out of plain flour so I used a mixture of wholemeal flour, semolina and ground almond)

Icing
300ml cream
1/2 can condensed milk - caramelised
1 tsp vanilla
1 tbsp honey
zest of 1 lemon 
2 tbsp sour cream

Prepare the condensed milk first, as this will take the longest.
1. Put the can of condensed milk in a pot. Cover the can with water.
2. Bring to boil, then turn to medium heat to simmer for 2 hours.
3. Turn off the heat and let the can sit in the water for about 10 minutes.
4. Remove can from pot and let it cool to room temperature before opening. [THIS IS IMPORTANT!!! If you open the can immediately, it will explode all over you.]

Cake
1. Beat eggs and sugar together until thick (approx. 3 minutes). 
2. In a bain marie, melt butter.(If you are improvising with a bowl and a pan, make sure the bowl does not touch the water).
3. Add honey. 
4. Add beaten eggs and sugar. Stir with a whisk until fully incorporated, (about 2 minutes). Make sure the water is only simmering, as boiling water will cook the eggs. 
5. Add the baking soda and vinegar. Stir. The mixture will bubble and double in size.
6. Remove from heat. Gradually add in the flour and mix in with a spoon or spatula. 
7. Knead the dough on a floured surface for about 1 minute.
8. Divide the dough into 6. On a baking tray lined with silicon pad or baking paper, roll a piece of the dough out thinly. Place a flat plat or base of a spring-form cake tin on the rolled out dough and cut around it to make a circle. Bake for approximately 5 minutes until golden.
9. Repeat this 6 times. 
10. Bake the off-cuts for approximately 8 minutes or until crunchy. 
11. Cool all cake pieces. 

Icing
1. Beat cream and caramelised condensed milk on medium setting until incorporated.
2. Add the remaining ingredients and beat on medium setting until well mixed.
3. Beat on high speed so the mixture thickens and becomes more stiff. 

Putting it all together
1. Place icing in between each layer of cake. Make sure the cake is stacked straightly. 
2. Cover the sides and top of the cake with icing. Spread evenly. Refrigerate to harden the icing. 
3. Break the off-cuts of the cake into small pieces. Use this to decorate the cake. 
4. Leave cake for at least 6 hours or overnight so the cake absorbs the icing and soften. 
5. Serve.


Recipe adapted from leascooking.blogspot.co.nz

Tuesday, 6 August 2013

Chocolate Chip Cookies


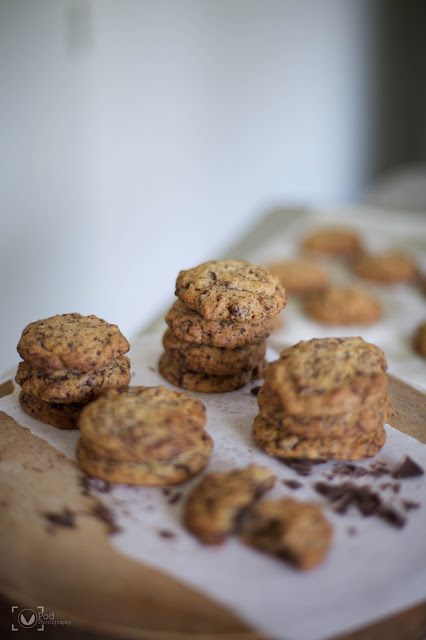
I've never really been that much of a cookie fan *gasps and disbeliefs from the rest of human kind*. That's because majority of the cookies I've had are waaaaaay too sweet. If you know me you'll know that even though I bake a lot of sweet food and desserts, I like my food on the less sweet side - dark chocolate instead of milk, cut out half the sugar, add a dash of salt, squeeze of lemon. A lot of cookies tend to taste of one note: sweetness.  Even if they're chocolate or cinnamon or marshmallow or whatever, that bland white sugar sweetness always predominates. 

I'm not sure if it's my tastebuds, but even cookies from certain well known cookie stores *cough* don't entice me. Come on people, you can't just rely on sugar and butter to flavour your cookie. There has to be that extra zing or zang or bang that creates fireworks in your mouth when you bite down on it. Yes I know I know extra sugar for chewiness blah blah. I'm sure there's a healthier way around it though.  One that does not entail diabetes and heart attack in its prescription. I shall find it one day.


This is actually the first time I made chocolate chip cookies.  I followed most of the recipe just to see how it tastes like. My sister the biscuit/cookie queen gave it her stamp of approval (which says a lot, you know, her being the cookie queen. Like no joke, we went to the doctors for a check up once, and even the doctor gave her a diagnosis of 'ate too much biscuits'). So, trusting her tastebuds which have seen many a cookie, this recipe will be included in my baking/blogging repertoire.  Not to mention, the original recipe boasts the reputation of being the best ever chocolate chip cookie by infamous Alice Currah.


[Chocolate chip cookies]

100g butter

3/4 cup raw sugar, finely ground
1 egg
1 tsp vanilla essence
1 1/2 cup flour
1/2 tsp sea salt
1/2 tsp baking soda
3/4 tsp baking powder
1 cup chocolate chips

1. Preheat oven to 170C. 

2. Cream butter and sugar together until light and fluffy.
3. Add eggs and vanilla and continue beating until well incorporated.
4. Sift together baking soda, baking powder, salt and flour. Add this to the cookie batter and mix on low speed until well incorporated.
5. Add the chocolate chips and mix until chocolate is evenly distributed. 
6. Spoon tablespoonfuls of dough onto lined baking tray. 
7. Bake for approximately 12 minutes until golden brown. 
8. Remove from oven and cool on wire rack.
9. Serve. 

Recipe adapted from savorysweetlife.com


Friday, 2 August 2013

Pandan Chiffon Cake


I recently watched a Korean drama called Immortal Classic which is about kimchi. Although the main protagonist of this show is kimchi, there are many underlying themes such as importance of preserving and sharing culture, trust between loved ones, being thankful to those that have cared for us even if they are not related to us and so on. 

The one message that really stood out for me and will affect my cooking and baking is to always bear the person that you're cooking for in mind, while you are preparing food.If you do that, you will naturally put more love into the process and consequently your food will taste better. And each food has it's own life force, or in chinese we call it 'qi', energy. How the food is prepared, the feelings and energy of the cook/chef during the preparation of food will translate into the food itself. This is why food prepared by hand, with care and love of the cook will always be so much better for you. This is why when you're preparing food, you should always do so positively and happily. If food is prepared in anger or with negative thoughts and feelings, it will contain negative qi. This is also why I am very against mass produced food, made by machines rather than with the warmth of human hands.

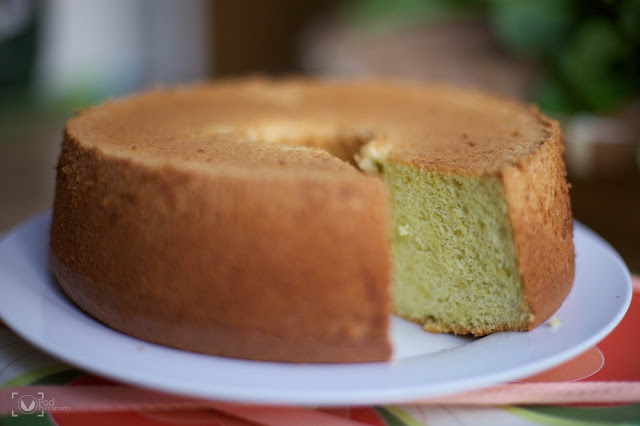
Pandan chiffon cake is one my favourite cakes to make. It is always well received. It looks stunning. And it's easier to make than you expect. The texture of it is so incredibly light. If clouds in reality really are what they look like - fluffy and pillowy, rather than mass of water droplets, I would imagine them to taste like chiffon cake.  

You might be able to see from the dual green tone flesh of the cake that I haven't quite perfected the cake yet (but trust me, it still tastes delicious!), but this cake was made with love whipped into the eggs and lots of good qi incorporated in the emulsion. 

I think that is one of, if not the most important part of learning how to cook isn't it? Through preparing food, learning how to care about people too. 


[Pandan Chiffon Cake]
150g flour
1 tsp baking powder
1/2 teaspoon salt

6 egg whites
Pinch of cream of tartar
100g raw sugar (finely ground)

6 egg yolks
50g raw sugar (finely ground)
75ml coconut milk
80ml oil
1 teaspoon pandan paste 
1 teaspoon vanilla essence 

1. Preheat oven to 160C. 
2. Sift together flour, baking powder and salt. Set aside. 
3. In a clean bowl, whisk egg whites until it starts to foam up. Add cream of tartar. Continue whisking until it becomes more foamy. As small bubbles start to form, gradually add in sugar. Whisk until stiff peak forms. Set aside.
4. In another bowl, whisk together egg yolks and sugar until thick and colour has paled. Add in coconut milk, oil, pandan paste and vanilla. Whisk until well incorporated. 
5. In three batches, add in the flour and with a spatula, fold into egg yolk mixture until incorporated. 
6. Add in the egg whites and fold gently until well incorporated. 
7. Pour into the chiffon cake tin. Tap on counter 3 times to get rid of big bubbles. 
8. Bake for 45 minutes until golden on top. 
9. Take out from oven and flip upside down so the cake does not collapse. Leave for 30 minutes like this then flip back upright, run a knife around the sides of the cake tin and remove cake from tin. 
10. Serve. 

*Note. The cake tin is not greased or lined, as the cake should stick to the sides. 
The chiffon cake tin has 'legs' which the tin can stand on when flipped upside down. I have not made this cake in a normal cake tin or a Bundt pan, so I'm not sure if it will work. With the chiffon cake tin, when you flip the cake upside down, it shouldn't fall out. 


C for Chiffon! Hehe